|
Trying Out JGuiGen
| [Previous] [Main] [Next] |
Trying out JGuiGen
Create Screen
|
|
|
|
|
|
|
|
|
|
|
|
| ComboBox - Pick a class/table to work with from this list. The list is determined from
|
| the SQL database you are working with. The "Y" or "N" at the end of each item indicates
|
| if you have processed this class/table before.
|
|
|
| CREATE - Click on this button and a CRUD GUI will be generated, compiled and run. It will pop up as soon as it is ready. You can work with it immediately and see if it does what you want. If not, you can make changes, click on the CREATE button again and
|
BANG! Your new application will appear.
| There are some other buttons you can use. Here is what they do. (The Advanced Checkbox will be covered at the end of this screen.)
|
| REFRESH - You use this button only if you have changed the structure of a table in your SQL database.
|
| CLASS - Edit things that relate to the whole class you just created here. The table you are working with will be automatically selected for you.
|
|
|
CLASS Edit Screen
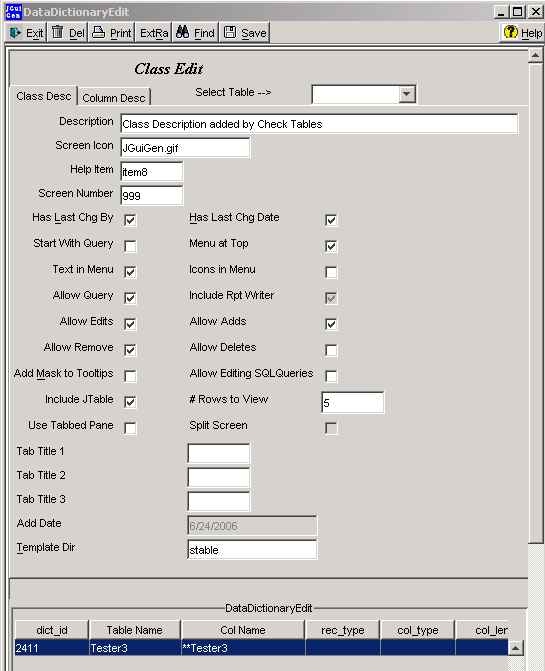
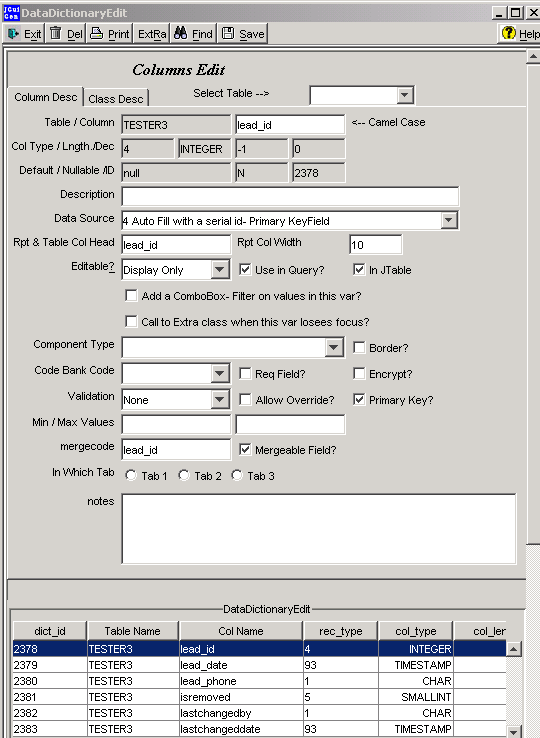
| COLUMN - When you open this screen, the screen will fill with data about the columns of the table you have chosen. The components on the screen that are only relevant to columns become non-editable and those that describe the GUI you want to generate for this table are editable. The elements on the screen allow you to describe each column from the SQL table that you will include in your GUI. You can enter the tooltip, decide which type of visual components you will use to render the column and much more. JGuiGen comes with a table called userlogdata. This table is used to demonstrate features of JGuiGen and to exercise most of the options available in JGuiGen. While you are editing this screen - press the help button for a description of all of the options and what they mean.
|
|
|
COLUMN Edit Screen
|
|
|
|
| (CODES BANK) - When you choose some of the more advanced java visual components you will need to supply additional information before the java code can be generated. For example if you wish to put M for male, F for female and U for Unknown into a char column in your table using a radiobutton, you will need to tell JGuiGen about the radio buttion group. In this case you need to tell JGuiGen that the group will contain three buttons names Male, Female and Unknown and what to put into the table when one of the buttons is selected. The Codes Bank table is where you supply this infomation. You supply a code (in this case "gender") and enter one record for each radio button you want in your group. This screen pops up over the Column Edit screen when you need it.
|
|
|
|
|
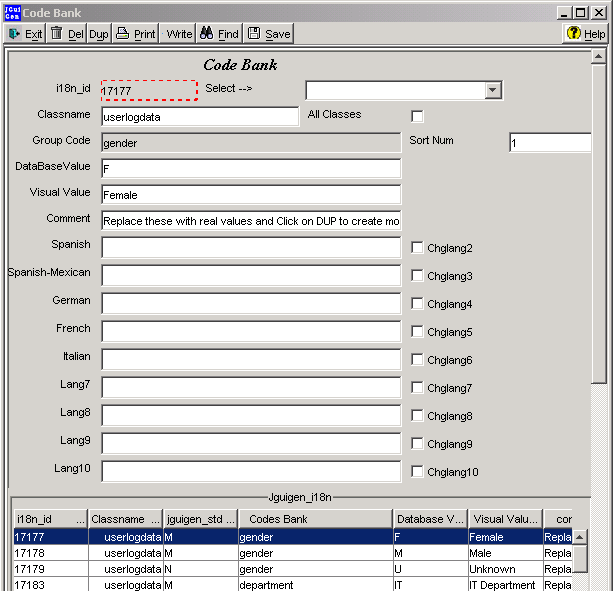
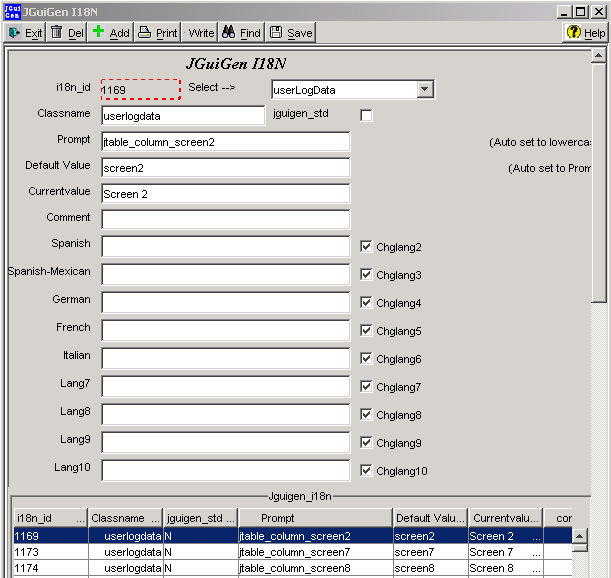
I18N Edit Screen
| RUN JUnit - runs the automatically generated JUnit test on the generated class (as soon as it exists.
|
|
|
| Exit and Help are obvious.
|
|
|
|
|
| ADVANCED CHECKBOX - When this box is checked several features are enabled.
|
|
|
| 1.. When you click on the REFRESH button and exit the MARK Table screen you will be given an option to "Removed Flags" When a new column is added to the data_dict tablr or when an existing column changes size or shape the column is flagged as NEW or CHANGED. As code is being written all references to these columns have comment //NEW NEW or //CHANGED CHANGED around all of the code that is related to the new or changed columns. At some point in time you will want to stop considering these columns new or changed. When you are ready you "Remove the Flags".
|
|
|
| 2. When you click on the CREATE button you will be given a couple of options to view and overwrite the TableModel class. The biggest difference is that you will see this screen before the actual java code is written.
|
|
|
|
|
|
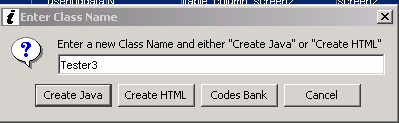
| This screen lets you 1) write Java or 2) HTML code. 3) You can change the name of the class that will be created and 4) you can access the Codes Bank screen directly.
|
|
|